Feeds:
Posts
Comments

Archive for the ‘Recipes’ Category

Since I last wrote in this blog, a lot has happened.  My husband and I moved to the city and renovated a very old craftsman bungalow.  It is a beautiful old home with lots of character, complete with a big yard in the back.  I used to live on a hill and longed for a garden.  I wanted so much to run outside and pluck some plump and delicious produce from my well tended garden, but the hill prevented these dreams.  This was no minor, politely rolling hill, but a steep grade that hosted daring children in ice and snow storms.  Jon rolled down the hill and lost his phone one year while trying to move the sprinkler.  This hill was not going to be the home of a garden. 

Now I have a wonderfully large and somewhat flat yard, and I have many dreams for my future garden.  There were some time constraints surrounding the development of a summer garden, so for this season Jon and I dug up some grass in the sunniest part of our yard, mixed in some decent soil, and stuck some vegetable plants in the ground.  Finally, FINALLY, we were working on our garden!  Now, my idealistic visions were slightly interrupted by the fact that our soil was peppered with things like giant stones, bricks, axe heads, railroad ties, bullets, glass, and other similar items.  There’s nothing like digging your hands into God’s green earth and pulling out a six inch long nail.  Furthermore, giant wisteria vines, some over six inches in diameter, are snaking their way through our entire yard, creating an underground subway system of inexplicable vine growth.  These had to be hacked through mercilessly.  Did I mention that the previous owner of our home was a hoarder and that our yard was filled with multiple cars and other piles of mystery items?  Couple this with the fact that my neighborhood is affectionately dubbed “the hood” for all of the reasons that you may imagine, and perhaps you can now understand the interesting components of my native backyard soil.

Nonetheless, Jon and I planted, and we have been carefully tending and watching our little garden.  I have been imagining all of the things that I will make with the tomatoes from my ten or so plants – roasted tomatoes, tomato pies, tomato sauces, salsas and salads.  I have been envisioning future appetizers of squash blossoms stuffed with ricotta and herbs and fried lightly, eaten as soon as they’re cool enough while standing at the stove, and pizzas delicately adorned with the bright golden blossoms spread out against the backdrop of my freshly made tomato sauce.  Alas, this dream is still out of my reach.  There is a tree at the edge of my property that is determined to shade my entire yard with its low hanging, intrusive branches.  At the pace my garden is growing, I will have tomatoes in 2015.  Meanwhile, my friend Becky experimented with a new, mutant soil formulation that is growing mutant vegetables.  Her plants are freakishly large and robust; the fruit of these vines astoundingly large and healthy.  You could fan someone with her squash blossoms.  The vegetables that they planted in the regular soil and manure mixture remain relatively normal, growing at a polite but steady pace.  The mutant soil is producing wild plants with giant fruit.  It is with these superplant squash blossoms that I made the delicious pizza below. 

This is a wonderful early summer pizza, redolent with floral notes and a brightness that is punctuated with oregano, marjoram and lemon zest.  This is not my usual flavor profile; you won’t get punched in the face with garlic or lemon.  There is no meat on this pizza.  Instead, it is a beautiful little work of art, with creamy ricotta and flavors that are light enough to make up for the fact that when you eat this pizza, a lot of it will end up on your hands and cheeks.  It is as messy as it is beautiful and delicious.  When I made it, I imagined that I was using my own tomato sauce and squash blossoms.  No matter – I look forward to my fall garden when I use the x-man soil that Becky has been using, complete with butter nut squashes the size of guitars and onions the size of boulders…

Squash Blossom Pizza

  • Pizza dough (I used good quality store bought; I have not mastered the elusive art of dough making)
  • One small can of unsalted tomato sauce (future recipes for homemade tomato sauce to appear when I have my tomatoes in 2015)
  • One clove of garlic, gently smashed
  • One splash of red wine, if you have it
  • A handful of squash blossoms, at least six to eight depending on size
  • About one tbsp each of fresh, chopped oregano and marjoram (don’t skip this!)
  • About ¾ cup of part skim ricotta cheese (or use full fat but definitely NOT non-fat)
  • About 1 tsp lemon zest
  • Olive oil, kosher salt, black pepper, red pepper flakes


    1. Preheat your oven, and a pizza stone if you have it, to at least 450 (or even 500) degrees.
    2. While the oven is heating and when your dough is almost done rising, pour a small can of tomato sauce into a small sauce pan, add a generous pinch of kosher salt, one smashed garlic clove and a splash of red wine to the pan.  Bring to a simmer and stir a few times, and remove from heat when nicely warmed through.
    3. Let the dough rise for at least an hour, flour your work surface, and do your best to stretch it out to pizza size, taking care to fill any holes that develop in the middle of the dough.  I try to stretch the dough gently with my hands instead of rolling out with a rolling pin, since the Italians will disdain you for using a rolling pin and they are the ones who invented pizza.  Don’t worry about the shape of your pizza; perfectly round is perfectly boring.  Putting the dough on parchment paper will assist you with transferring it to the stone or pan for the oven.  The parchment paper can survive the heat of the oven and still allow the bottom of the pizza to crisp nicely.
    4. Lightly dress the pizza dough with the tomato sauce, spreading gently with the back of a ladle.  It is not necessary to drown the dough with the sauce.
    5. Spread the squash blossoms gently onto the pizza dough in a sunburst or sunflower shape.  Brush them as well as the edges of the crust with a little olive oil. Scatter the pizza lightly with some red pepper flakes for a punctuation of heat.
    6. Place the pizza in the oven and bake for about eight minutes, or until the sides of the crust are nicely browned and puffy.
    7. While the pizza is in the oven, mix the ricotta cheese with some salt, pepper and the lemon zest.  Form the ricotta into little caneles and set aside.  I’m sure you can find a Youtube showing how to do this; if you’re not into the caneles, be prepared to schmear the cheese on the pizza in generous dollops.
    8. When the pizza is done, place the caneles between the squash blossoms, evenly in a circle around the pizza.   Scatter the pizza with the chopped herbs and drizzle with good quality olive oil. 
    9. Eat this pizza and dream about the ways in which digging in the soil and eating from our own “land” connects us with something good and true and ancient.

Kerri and Alyssa; thank you for inspiring me to start my blog again.  I hope you enjoy.

Don’t skip ANY of the ingredients; in a recipe this light and simple, they all add a necessary component to the overall taste and flavor.  Omitting any of them would take away from the harmonious tastes. 

Read Full Post »

I’ve just returned from a week of travel, and the refrigerator is a tad bare.  But I’m hungry.  And we need to eat lunch.  There’s half a shallot from last night, some feta cheese that is still good, a jar of roasted red peppers, and four eggs.  A rummage through the fruit drawer leads me to two lone grapefruits.  Ladies and gentlemen – we have a lunch!

It is very interesting how some of the most delicious things that I’ve eaten for lunch have been discovered through the use of odds and ends ingredients and the benefit of a well stocked pantry and spice cabinet.  I will never forget the day the kitchen sink eggwich changed my life… 

Anyway, as I was sauteeing the red peppers, shallots and garlic, I added a little pinch of dried basil and a little pinch of dried oregano.  Everything was smelling fragrant and delicious.  I started feeling sassy and added a splash of dry sherry to deglaze the pan and WOW.  Sherry and eggs and shallot and garlic and feta and basil and oregano and roasted red peppers equate to very, very tasty and wonderful scrambled eggs.  The salty feta is such a wonderful counterpoint to the other flavors.  I think my humble little eggs felt very fancy with the addition of that dry sherry.

Now if we ever have any fancy people show up for brunch, I’ll serve them these scrambled eggs; they’re the best I’ve ever had.  In the meantime, I plan to add this to the regular rotation, finished with two juicy little grapefruits drizzled with honey or any other fruits hanging out lonely in the fruit drawer.  A handful of lettuce tossed in vinaigrette will also make a very tasty addition. 

scrambled eggs – fancy pants style

serves two

  • two cloves of garlic, minced
  • one small shallot or half of one large shallot, chopped
  • one roasted red pepper, chopped
  • four eggs, cracked into a bowl and whisked with a splash of milk, salt and pepper
  • a pinch of dried basil
  • a pinch of dried oregano
  • about two tbsp of dry sherry
  • about 1/3 cup of crumbled feta
  • kosher salt and freshly ground black pepper
  • a splash of extra virgin olive oil
  1. heat a non-stick pan over medium heat and add enough olive oil to thinly coat; add the garlic, shallots and roasted red peppers, and cook until just beginning to brown – stir regularly to prevent the garlic from burning
  2. slowly pour in the sherry, stirring to coat the vegetables (you should hear the sherry sizzle in the pan)
  3. reduce the heat to low and add the eggs, stirring constantly around the edge of the pan to gently “scramble” the eggs
  4. when the eggs have reached their desired consistency, gently stir in the feta
  5. garnish with some chopped chives or parsley if you have fancy people dining with you

Read Full Post »

A few years ago I met the most extraordinary Lebanese woman named Diana.  She was living with my in-laws while completing her Master’s Degree in Counseling.  I think she may have secretly been an angel sent straight from heaven; she taught me about Lebanese food and fed it to us in copious amounts, and she consoled our family as we helplessly waited day after day at the hospital, my father-in-law dealing with a devastating illness that nearly claimed his life.   

I relished the time we spent chatting on the sofa for so many reasons, but I found it especially interesting to discuss our different worldviews and the cultural nuances that shaped us both as young, independent, determined women.  For instance, when I hear a rumble of thunder, I think of the spectacular storms that I grew up with in Texas.  Diana wonders where the bombs are falling.  

Apparently Diana cast a spell on us with those meals, because I have been intensely passionate about Lebanese food ever since (and when I say “intensely passionate,” I really mean crazed).  She sent me home with precious little baggies of za’atar, sumac, seven spice and white pepper, but I had high hopes of discovering the exact components of seven spice to simply mix the spices myself.  No such luck.  Between my English and Diana’s mom’s Arabic, we couldn’t get it completely figured out.  Internet research will lead you down varying paths, but the mixture can vary from family to family.  I definitely know that clove, cinnamon, allspice, pepper and nutmeg are the heavy hitters; it gets tricky with the remaining two spices.  Some say ginger and fenugreek, some say caraway and cumin…  I can’t stand to waste a meal not getting it exactly right, so I buy my seven spice from the patient and diligent owner of Leon’s International Bakery and allow it to remain exotic and mysterious. 

The first time I visited Leon’s I arrived armed with my tiny ziploc baggies of Diana’s spices.  I believe I made a memorable impression that day, and not just because I was caught dancing in the aisle to the Arabic music that was playing.  I called the gracious owner of Leon’s over to his spice rack and I held open each little baggie, focusing especially on the seven spice.  “Please smell this,” I said.  He raised an eyebrow and sniffed.  “Please tell me if you are selling exactly this mixture here at your store,” I said.  He assured me that it was likely to be very close.  “This is from Lebanon,” I said.  He nodded.  “I’m very intent on getting this exact mixture because I want to replicate certain dishes – please do sniff again – my bag first and then your spice mixture.”  That blessed man sniffed again, offering his sincere assurance that I would be satisfied.  As I said, “passionately intense.” 

I made my purchases that day, and needless to say, his mixture is the best I’ve tried yet.   During my last visit I was explaining this to him – that I have tried blends from other reputable providers in many U.S. cities, and that his is the absolute best.  “Because it is the original,” he says.  I continued on in my monologue, assuring him that his offerings are unmatched in taste and aroma.  This must qualify me as an expert, because he turned and asked me if I was originally from Lebanon. 

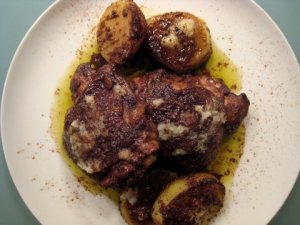
There are so many Lebanese dishes that we eat with great frequency in our home, and I want to share all of them with you.  My favorite dishes call for generous amounts of lemon and garlic and olive oil, astringent sumac for a tangy zip and lots of seven spice for depth and deliciousness.  However, they deserve to be discussed one at a time, so I’m starting with the first dish that Diana served to us – chicken and potatoes.  I haven’t found this exact recipe in the one hundred or so Lebanese cookbooks that I’ve looked through, so I assume that the combo of chicken and potatoes is one that Diana’s mom prefers.  I like that. 

Diana’s way is good enough to have Jon and I pine after it like forlorn lovers, but I recently applied that high heat, miraculous roast chicken method to the recipe, and our lives changed forever.  This post is already exceedingly long, so I’ll spare the finer points of why cooking chicken this way in the oven is really the only way to do it.  You can check the details out in chapter one and chapter two of the fabulous roast chicken saga. 

Let me instead tell you about how the potatoes and will soak up this heady blend of spices, and will cook to perfection doused in lemon and garlic.  The chicken will be succulent and juicy and flavorful and silky and fabulous.  The olive oil and spices and lemon and garlic will meld together in the baking dish to form the most glorious sauce that has ever graced a silly little potato or a humble piece of chicken.  Your house will smell glorious.  Your life will change.  You may cry tears of joy.  And while you belly dance your way through the kitchen to drink the remaining olive oil directly from the baking dish, you too can be transformed into an honorary Phoenician, changed forever by Diana’s chicken and potatoes. 

chicken and potatoes – serves four or two really hungry and over indulgent people

  • one bone in skin on chicken cut into pieces, or two bone in skin on breasts, or several bone in skin on thighs – decide based on the number of people that you are serving
  • three to six russet potatoes, peeled and cut into half inch medallions
  • four or five cloves of garlic, grated with a microplane zester or smashed to a paste in a mortar and pestle
  • two or more lemons, juiced
  • two heaping tbsps of Lebanese seven spice
  • one heaping tbsp of allspice
  • one heaping tbsp of cinnamon
  • 1/2 heaping tsp of ground white pepper
  • kosher salt to taste, about one tsp
  • a generous amount of olive oil
  1. mix all of the spices and salt together in a small bowl, and add enough olive oil so that the spices and oil together form a thick, soupy mix – you don’t really want a paste, but you also don’t want a soup – you want a well stirred homogenous mixture
  2. grate the peeled garlic into another small bowl, and juice the lemons into the same bowl – whisk together
  3. put your chicken in a large glass baking dish, cover the chicken with the spice and oil mixture – be sure and generously coat the chicken, making sure to put plenty of the mix under the skin – then, carefully spoon a small amount of the lemon and garlic mixture UNDER the chicken skin, taking care to keep any of the lemon and garlic mixture from getting on the top of the chicken skin
  4. place the chicken on the very top shelf of a five hundred degree oven, and bake for fifteen minutes
  5. meanwhile, peel the potatoes and cut them into half inch medallions
  6. cover the potatoes with cold water in a saucepan and bring to a boil – simmer for ten minutes and then drain
  7. when the chicken has baked for fifteen minutes, pull the pan out of the oven and add the potatoes, covering them generously with the remaining oil and spice mixture – give the entire pan a few extra glugs of olive oil – be generous
  8. bake the chicken and potatoes for an additional fifteen minutes
  9. pull the chicken and potatoes out and pour over the lemon and garlic mixture, and bake for five more minutes
  10. remove from the oven and serve, with the olive oil sauce poured over the chicken and potatoes

Read Full Post »

I love it when I make something from scratch and have enough left over to store some in the freezer.  It makes me feel so prepared… so wholesome (which is excellent since “prepared” and “wholesome” probably aren’t the first words that come to mind when describing myself).  It also makes me feel smart, because making something from scratch that you would normally buy jarred from the store tends to be much tastier, much cheaper, and much better for you.   

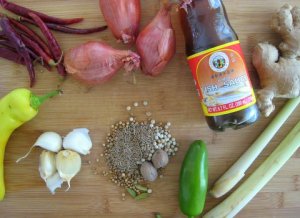
the components

In fact, I love this so much that one may assume by the looks of my freezer that an eighty-five year old woman lives at my house.  My freezer is full of little labeled bags, each one containing enough of some little morsel or ingredient to be used for a specific serving amount.  Didn’t use an entire can of tomato paste or chipotle chiles?  Just divide the rest up and put it in a little bag, I say!  Who doesn’t love stretching one dollar across four meals?!  If only I exercised this level of mindfulness and precision with my laundry or, I don’t know, our budget.

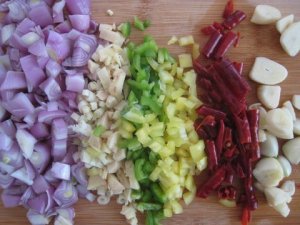
accidental art

Back to making things from scratch; I’ve been really into this lately.  The discovery of very inexpensive spices that can be found at international markets (basically any place that sells food outside of your conventional chain grocery store) opens up a new world of possibilities in this realm.  I’ve always been a relative purist in terms of cooking meals from scratch; I keep it simple and fresh with veggies, grains, meats and bread.  Now I’m moving on to condiments.  I have big plans for some Guiness mustard, a fantastic worsteshire sauce, Harissa paste and maybe ketsup.   Once you deconstruct a sauce or flavor component that you use regularly and typically pick up at the store, you discover that the ingredients in a store bought item tend towards fillers and artificial ingredients that diminish flavor and aren’t really good for you.  Homemade marinara or Bolognese sauce, for instance, is a revelation after years of stuff from a jar.

possibilities

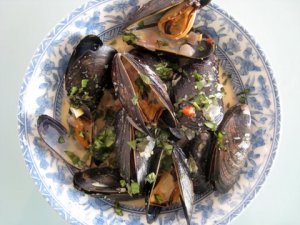
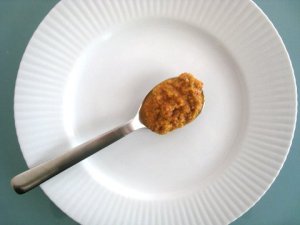
Anyway, I started this journey with Thai Red Curry paste.  The beauty of Thai Red Curry paste (aside from the fact that it is utterly delicious) is that it has so many uses: stir a little into noodles, add some to rice, slather on meat for a marinade, whisk some into soup, add to oil and vinegar for a unique salad dressing… Having some of this curry paste on hand means that a can of coconut milk, shallots, lime and a pound of mussels is all it takes to quickly put together an elegant and exotic meal.  I love this!  I enjoy so much the complilation of all these ingredients, coming together to make something fantastic.  There may be a little extra work on the front end, but I’m so thankful when I pull my well marked baggie out of the freezer for instant flavor.  This little trend has started to extend to a multitude of other genres… spice blends, jams and jellies… I’m actually dreaming of getting my hands on some veal bones to make my own demi glace this Fall.  

the end result

In the meantime, I’ll just share this recipe that I used from Saveur; I hope someone will try it and share with me in the unusual satisfaction that comes from a freezer full of tiny baggies.  

thai red curry paste

  • 8 dried chiles de arbol, stemmed and seeded
  • 1 tbsp corriander seeds
  • 2 tsp cumin seeds
  • 1 tsp white peppercorns
  • 3 cardamom pods
  • 1/4 cup roughly chopped cilantro, with stems
  • 2 tbsp canola oil
  • 2 tbsp fish sauce
  • 2 tsp kosher salt
  • 1/4 tsp freshly ground nutmeg
  • 5 gloves of garlic, smashed
  • 3 shallots, roughly chopped
  • 2 holland or fresno chiles, stemmed, seeded and chopped
  • 2 stalks of lemongrass, tough outer layers discarded, tender interior layers finely chopped
  • 1 one inch piece of ginger peeled and roughly chopped
  1. break the chiles de arbol into pieces, transfer to a small bowl, and cover with one cup of boiling water; let them soak until softened – about 20 minutes
  2. meanwhile, add corriander, cumin, peppercorns, and cardamom to a small skillet over meadium head; toast spices, swirling constantly, until very fragrant – about 4 minutes
  3. transfer spices to a grinder (I use an electric coffee grinder) and grind to a fine poweder – set aside – (if you’re feeling really rustic, you could smash and grind them with a mortar and pestle)
  4. strain the chiles de arbol through a sieve, reserving the soaking liquid
  5. in a food processor, combine chiles de arbol, ground spices, fish sauce, cilantro, oil, salt, nutmeg, garlic, shallots, fresh holland chiles, lemongrass and ginger – puree until paste is smooth, about 2 minutes (sprinkle in a tbsp or two of reserved chile soaking water to help paste grind)
  6. refrigerate for up to three weeks or freeze for up to three months

Thai Red Curry paste doesn’t have the flavor that many people associate with the traditional Indian Yellow Curry; the word “curry” is used in both Indian and Thai cuisines to indicate a pungeant and flavorful spice paste or mixture, and is not indicative of one specific flavor or aroma.

Read Full Post »

summer on a plate

summer on a plate

Summer is almost over, my friends.  It’s going to be hard for me to say goodbye to the berries, the peaches, the summer squash – all of the beautiful produce that is overflowing at the market right now.  I’m clinging to this food season with every meal, and tonight was quintessential summer. 

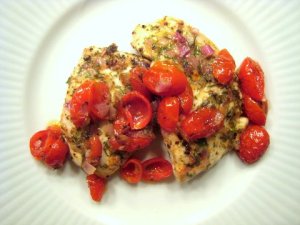
Roasted baby tomatoes and a fresh and lively vinaigrette go perfectly with simple pan sauteed chicken; shallots and the sweetness of the tomatoes add a mellow balance to the assertive flavors of dill, mustard and champagne vinegar.    We ate this with fresh yellow corn on the cob, slathered in butter and seasoned simply with salt and pepper.  The corn is really so delicious that it doesn’t need anything, but I look for any excuse to eat a little melted butter. 

Even though it’s been raining for at least five days straight in Atlanta, I felt so summery while we ate dinner… I gnawed (literally) on my tender little corn and imagined that I was sitting at a picnic table somewhere outside near some tall, climbing trees, a canopy of twilight stars over my head, warm summer breeze on my face and a show of fireflies twinkling through the trees… I could almost smell freshly mown grass and honeysuckle… Yes – buttery, perfectly in-season corn can cause me to wax poetic; I might have even burst out with a rendition of Billie Holiday’s Summertime if a pitcher of homemade lemonade had graced our table.  Jon broke up my mental reverie by announcing that our dinner made him nostalgic for the summers of his childhood when he and his family would pick corn from a neighbor’s field.  I love food that is so firmly planted in a season or a memory that each bite, each taste, transports you to a cherished place or time. 

I should also mention that his warm and fuzzy recollection was followed by a comment that corn on the cob is really better eaten at home than in public.  I chose not to ask about the inspiration for this proclamation, but instead to wipe the butter and corn from my chin and cheeks. 

This was ready and on the table in less than thirty minutes; it would be a tragedy for others that I know and love to not share in the final stages of summertime deliciousness by eating this fantastic meal.  The original recipe came from Gourmet and can be found here; the recipe below is with my modifications. 

As for my bizarre three week absence from the blog, I have no explanation.  All I can say is that I’m back!  Thanks to those of you who encouraged me to get writing again.

chicken paillards with tangy tomato-dill relish and tender buttered corn

  • four skinless, boneless chicken breast halves
  • 1/4 cup extra virgin olive oil
  • 1/4 cup chopped dill
  • 3 tbsp finely chopped shallot
  • 1 tbsp grainy mustard
  • 1 tbsp champagne or white wine vinegar (or red wine, if you don’t have either of those two)
  • 1 pint of cherry tomatoes, halved (I like to scoop out the seeds with my finger)
  • fresh corn on the cob, shucked
  • butter, salt and pepper to taste
  1. preheat oven to 425 degrees and set a large pot of water to boil
  2. pound the chicken breasts to 1/4 of an inch thickness between two sheets of plastic wrap with a meat mallet or rolling pin
  3. whisk together oil, dill, shallot, mustard and vinegar in a large bowl
  4. toss the halved tomatoes with a few spoonfuls of the vinaigrette mixture and roast in the oven for seven to ten minutes
  5. meanwhile, season the chicken breasts with a little kosher salt and pepper and spoon some of the vinaigrette over one side of each breast
  6. add chicken breasts to a skillet heated over medium heat, vinaigrette side down; spoon more vinaigrette over the unseasoned sides of the chicken in the pan; cook chicken three to four minutes per side, adding the remaining vinaigrette at the end of cooking
  7. while chicken is cooking, add corn to boiling water and cook for five to six minutes
  8. serve the chicken with the roasted tomatoes scattered on top – buttery corn on the side – prepare to reminisce in happiness

This recipe serves four, but I made the full amount of vinaigrette for our two pieces of chicken because I like things saucy and extra flavorful; if serving four you may want to make some extra vinaigrette.

I generally use this method for cooking chicken; splitting a chicken breast between two people is actually an appropriate portion size, saving money and extra calories.  Pounding the chicken flat allows for quicker, more even cooking and a seemingly larger size.  This is a great, everyday method.


Read Full Post »

tastes as beautiful as it looks

tastes as beautiful as it looks

If you want to sing because you have just eaten something delectable – if you want to feel like you are dining in the manner of aristocrats – if you want an absolute slurpy flavor explosion with each little bite of food, then you need to prepare and eat the mussels that I just had for lunch.  Seriously.  I’m getting really passionate again about my lunch but it’s completely valid. 

Mussels are so good and easy to make.  The strangest thing is trying to guard their little lives so much from store to home, then confirm that they’re all healthy and thriving, only to quickly extinguish those little lives in a steaming pot.  I would be kind of sad about it if they weren’t so extravagantly delicious. 

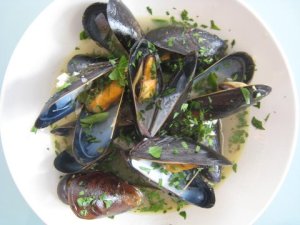
I have been craving mussels and a  smattering of left over ingredients from the week came together very quickly to make an absolutely glorious broth that obviously gets me very excited.  A pinch of saffron and the addition of a tiny anchovy filet (both pantry staples in my house) added an extra layer of flavor to ingredients that are already outstanding.   Imagine this bite: one tender little mussel swimming in a fragrant broth that tastes of wine and lemon and garlic and fresh parsley and summer with a hint of thyme and saffron.  I realize that I sound a bit over dramatic sometimes when I talk about some of these things, but when food tastes this good it makes me want write poetry.  And love letters.  Food love letters, if you will. 

We ate these mussels with some toasted slices of french baguette, rubbed with a clove of raw garlic and drizzled with olive oil and salt and pepper.  If you haven’t eaten bread this way, you are missing out on one of life’s great and simple pleasures.   

The recipe below serves two and the entire meal took about twenty minutes to prepare; there really isn’t any excuse for you to not share in this experience with me.  I want everyone to experience these little tastes of the good life – together.  Let’s start with these mussels. 

tender mussels in fragrant wine broth

  • a pound and a half of mussels, scrubbed and debearded if necessary
  • a cup and a half of white wine
  • three cloves of garlic, chopped
  • a quarter of an onion or a couple of shallots, chopped
  • a generous handful of fresh parsley, chopped
  • four or five sprigs of thyme, leaves removed and stems discarded
  • half of a lemon (meyer is best)
  • one little anchovy fillet
  • a pinch of saffron (maybe five or six small threads)
  • one tbsp of butter
  • extra virgin olive oil
  • about one tsp of kosher salt and freshly ground black pepper
  1. add the saffron to the wine and let soak while you begin cooking
  2. heat the butter and olive oil in an appropriately sized sauce pan over medium heat, and add the chopped onions, salt and pepper and stir frequently for about two minutes
  3. add the garlic, anchovy and thyme and cook for a minute or two more, stirring frequently
  4. add the wine (with saffron) and about two thirds of the fresh parsley and bring to a boil
  5. gently add the mussels, cover and reduce to medium, cooking for six to seven minutes (all mussels should be open – discard any that do not open)
  6. ladle the mussels and plenty of the broth into wide bowls and garnish with the rest of the fresh parsley; serve with crusty garlic bread

All mussels should be scrubbed and inspected before cooking; discard any mussels that have cracked or broken shells.  If a mussel is open, gently tap it on the shell; if it doesn’t close it should also be discarded. 

Read Full Post »

tastiness abounds

tastiness abounds

Last week was so crazy (hence the single post).  Weeks of going through closets and boxes culminated in a very successful garage sale.  Yippee!  To celebrate, I got everything I needed for a recipe that I was saving from Saveur.  Oooohhh I couldn’t wait to share it with everyone; snapper baked in foil with clams, lemon, smoked sausage, fennel, olives, orange zest, shallots, fingerling potatoes, white wine… sounds amazing, right?  It wasn’t.  It just wasn’t good.  DANGIT.  I hate it when that happens! 

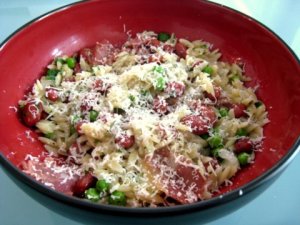
So, I’ll share a faithful old stand-by instead.  I used to make this all the time when I first started cooking… somehow it has left the regular rotation.  We had it for lunch today and I was reminded of why we used to eat it so frequently!  This is a very elegant take on red beans and rice; it’s extremely comforting but also a little refined.  I love the soft orzo and the mixture of sweet peas, salty prosciutto and freshly grated parmesan.  It’s herby, elegant, delicious, and you can get it on the table in about thirty minutes.  Nice!  Today I added a little green salad on the side with a quick dressing made from lemon, dijon, marmalade and white wine vinegar, topped with toasted, slivered almonds.  It was the perfect compliment. 

I have big plans for the rest of the week – lots of things from scratch – thai red curry paste, worsteshire sauce, pickled okra and fresh ricotta ravioli (my first attempt at homemade pasta) – I’ll keep you posted!  In the meantime, let me know if you make this and what you think of it.  Oh, and if anyone has any tips on making pasta dough, I will be very grateful!

red beans and orzo

  • 2 cups of low sodium chicken broth
  • 1 1/2 cups water
  • 1 1/3 cups orzo
  • heaping 1/4 cup chopped onion
  • heaping tsp of italian seasoning or herbes de provence
  • one can of red beans, rinsed and drained (use dried of you’re feeling extra special)
  • one ounce of proscuitto (de parma is best) cut into little strips (you can use ham if you must, or smoked turkey if you don’t eat pork)
  • 1/2 cup frozen or fresh sweat green peas
  • a good handful of fresh flat leaf parsley, chopped
  • a generous handful of freshly grated parmesan cheese for each serving
  • kosher salt and freshly ground black pepper
  1. bring broth and water to boil in a medium saucepan
  2. add orzo, herbs, onion and a generous amount of kosher salt and freshly ground pepper; reduce to a simmer and cook for twelve to fifteen minutes until most of the liquid is absorbed and the orzo is tender (do remember to stir every now and then)
  3. add beans and peas, and cook for a minute or two more to warm through
  4. stir in the prosciutto and serve with freshly grated parmesan on top – be comforted! 

Read Full Post »

eggwichBoy howdy, I’ve been eating some good lunches this week!  I mean, they must be good to make me say things like, “boy howdy.”  Hot damn, even!  My knack for saving things in the freezer in the manner of eighty year old grannies combined with my need to use up any leftover ingredients manifested themselves today into the best eggwich that I’ve ever eaten.  Ever.  An absolute work of impromptu eggwich art.  A sandwich so good as to inspire a spontaneous and uncharacteristic “boy howdy” must be shared. 
I didn’t ever eat eggwiches before Jon turned me on to them.  In fact, does anyone else use the term “eggwich” or did we just make that up?  Either way, I love them now and today’s eggwich is going on the menu of my imaginary cafe.  We had some left over fresh mozarella and pancetta from a pizza earlier in the week; these precious ingredients cannot go to waste.  Those plus some french hamburger rolls from the freezer, some thin slices from a red onion, a few frozen artichoke hearts, and a little schmear of mayonnaise spiked with dried basil amounted to rich, creamy, delectable, gooey eggwich heaven. 

These are some of the best flavors in the world – salty bacon, runny yolk, basil, mayonnaise (or just fat in general), artichoke hearts, fresh mozarella cheese – all on a chewy, soft french roll.  Hallelujah!  I love this eggwich.  I wanted to make out with this eggwich.  I know it’s weird, but I don’t care.  Are you ever this in love with your food?!  We ended our lunch with some fresh green grapes – it was a perfect finish to the richness of the sandwich.

I hope you are inspired by this kitchen sink eggwich.  You should make it exactly as is and discover what kind of random, joyful expletives burst out as you devour every perfect bite.  OR – you should make your own kitchen sink eggwich with your left over ingredients and tell me all about it.  Either way – bon appetito!

best ever impromptu kitchen sink italian eggwich

  • two eggs
  • a few slices of pancetta, quartered
  • a tbsp or so of mayonnaise
  • one tsp or so of dried basil
  • three artichoke hearts, chopped
  • a few thin, half moon slices of red onion or shallot
  • one garlic clove
  • two balls of fresh mozarella cheese, torn into smaller pieces
  • two french hamburger buns
  1. warm whole hamburger buns in a 400 degree oven for five minutes; remove them, cut them in half, rub a little garlic on each cut side and add the torn mozarella cheese; cook for five to seven minutes more or until bread is soft and cheese is gently melted but not brown
  2. meanwhile, mix chopped artichoke hearts, dried basil and mayonnaise together; season with a pinch of salt and ground pepper
  3. heat a skillet over medium heat and crisp up the pancetta with a small drizzle of olive oil; remove and drain on a paper towel
  4. add eggs, one at a time, to warm skillet and cook them over medium; the yolk should be a little runny (cook for a minute and a half and then gently flip over and cook for about one more minute on the other side)
  5. assemble the sandwiches with the mayonnaise, egg, pancetta and red onions – glory!

Read Full Post »

see the foamy white goodness on the salmon?  that's hot butter

see the foamy white goodness on the salmon? that's hot butter

I think I may have mentioned this already, but salmon isn’t really my favorite fish.  It’s just so salmony.  So it’s funny that we eat it about once a week in our house.  Clarification: I don’t care for it as much when other people fix it, I love it when I prepare it myself.  Is that snooty?

The thing about salmon is that it’s so affordable and a cinch to prepare, extremely good for your body and a very sustainable fish.  All of these things appeal to my sensibilities.  Also, I have found some ways to make salmon taste creamy, not salmony. 

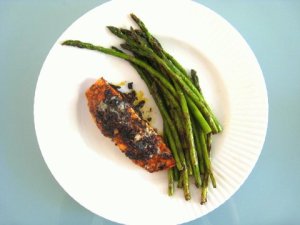
Imagine a plumpy, flaky, juicy little piece of pink fish, covered in a delicious blackened crust – onions, garlic, paprika and cayenne all come together to create a smoky depth of flavor – a little lemon and thyme add brightness and keep things interesting.  Imagine drizzling a little bit of browned butter on the fish – it sizzles on the crust – buttery magic is happening.  Now imagine yourself taking the perfect bite of creamy fish – the crunch of the crust is so toothsome – the soft richness of the salmon is a perfect contrast.  I mean really, imagine this.  You too can be so passionately dramatic about a fish that you’re not even sure you like.  Indeed, that is how spectacular this recipe is.  I’m getting worked up just thinking about it (even with a belly full of the best homemade pizza that has come from my kitchen to date)…    

Furthering the greatness of this dish is the fact that I can throw it on my indoor grill with some asparagus and call it a night.  Jon and I split a large, skinned filet between the two of us but you could get wild and have an entire filet to yourself – just increase the amount of the spice mixture.  Speaking of wild, Sockeye and other non-farmed varieties of salmon are abundantly available right now – there are no excuses to not to have a euphoric salmon experience this week.

blackened salmon with a brown butter drizzle       

  • one large, skinned salmon filet cut in half
  • two tbsp of onion (red, white, yellow – use what you’ve got), finely minced
  • two cloves of fresh garlic, minced
  • a heaping tsp of paprika, maybe a little more
  • a heaping tsp of dried thyme
  • 1/4 tsp of cayenne pepper, or more if you like heat
  • 1/4 tsp of smoked pimenton or smoked paprika (if you don’t have this on hand just omit it – it’s just a bonus)
  • a very generous pinch of kosher salt and lots of freshly ground black pepper
  • a very generous drizzle of extra virgin olive oil, probably a few tbsps
  • half of a lemon
  • a tbsp or so of butter
  1. combine the onion, garlic, cayenne, paprika, thyme, salt, pepper and lemon in a small bowl and add enough olive oil to form a nice wet paste (just for fun, take a big whiff of the mix – it will be aromatic and wonderful)
  2. cover one side of each piece of salmon with some of the spice mixture, and place spiced side down onto a well oiled grill pan or skillet on medium heat
  3. add the remaining spice mixture to the exposed side of the salmon
  4. cook the salmon for three to four minutes per side, depending on the thickness of the filet (be gentle when you’re turning the fish over so that the crust stays with the fish)
  5. in the last few minutes of cook time, melt some butter over medium heat, swirling gently until is begins to brown
  6. plate the salmon and drizzle the hot butter immediately over each fillet – serve with another squeeze of lemon and thank God for the privilege of food and taste buds

Do you want more salmon?  How about favorite spring salmon on peas with lemon brodetto or salmon with citrus pesto? Mmmmm….

Read Full Post »

tasty and wonderful

tasty and wonderful

The last time I was in Israel I arrived in Tel Aviv at dawn.  I left Athens for Israel at one in the morning, and it took many hours of travel before I finally reached Tiberias, my first stop on the journey.  Tiberias is a beautiful little city that occupies a short stretch of the coast along the Sea of Galilee.  There are small and winding stone alleys, a lively beach scene, elegant boutique hotels and crumbling, ancient minarets left over from the Ottomans.  Ignore the young teenagers carrying machine guns; it’s a charming town.  Tiberias is particularly special to me because it is where I met my husband.  I can easily conjure the colorful, swirling, exhilarating memories of the night that we met, so you can imagine how excited I was to return with him three years later.

However, our reunion with this cherished city was not the picture of romance that I envisioned.  We were tired, confused, starving.  We had been up for hours.  We were hangry (a unique physical/emotional state brought on by low blood sugar; hunger+angry=hangry).  People that know me know about hangry.  Hanger must be attended to.  We ended up at a small place called Little Tiberias.  We ate quite a few dishes that day, but I only remember the fried cauliflower.  Is it terrible to say that my memories of the fried cauliflower run alongside my memories of meeting Jon? 

off the coast of tiberias

off the coast of tiberias

I don’t know if I have ever loved a vegetable the way that I loved that cauliflower.  It could have been because I was starving but I’m pretty sure its because it was out of this world.  It was tender and crispy all at the same time, warm and smothered with garlic and olive oil and lemon and coriander leaves.  My mouth is watering as I write this.  My passion for this cauliflower was so intense that the chef came out and shared the recipe with me, which basically consisted of “loads and loads of garlic” and “tons of lemon and olive oil” and “good white cauliflower dropped in a lot of hot oil.” 

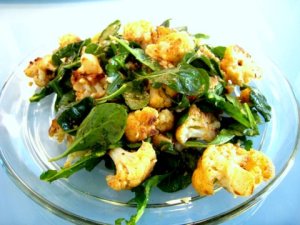
Cauliflower is an underused vegetable, pushed aside all together or covered in fake, melted cheese.  Yuck.  I have always enjoyed its earthy flavor and prefer it  roasted in the oven with lemon or nutmeg or paprika, but ever since that day I really love my pretend Little Tiberias version.  I don’t technically fry the cauliflower (although I’d like to try one day) and I swapped the coriander leaves for arugula, but it still tastes delicious and reminds me of Israel and love and beach and sunshine.  I also added a little bit of paprika – no idea why.  The cauliflower gets nice and browned and lemony and garlicky – the wilted arugula a perfect complement.  Please try this immediately and tell me all about it or share one of your favorite ways to prepare cauliflower!    

lemony garlicky cauliflower and wilted arugula (and love)

  • one head of cauliflower, cut into bite sized florets
  • four or five cloves of garlic, chopped
  • one large or two small lemons (meyers are best)
  • one generous handful of arugula
  • one teaspoon of paprika
  • kosher salt and freshly ground pepper
  • extra virgin olive oil
  1. heat a very generous amount of olive oil in a large skillet over medium high heat and add the cauliflower, cooking for a few minutes untouched until they begin to brown
  2. add the paprika, salt and pepper and give the florets a turn or a shake to encourage nice browing on their opposite sides
  3. once cauliflower is browning nicely, squeeze half of a lemon over the florets, add a splash of water, reduce heat to medium and cover, cooking for about 8 more minutes or until cauliflower is tender (be sure and check temperture level and add a little water as necessary to keep from burning)
  4. in the meantime, whisk the rest of the lemon with some extra virgin olive oil and a pinch each of salt and pepper to create a simple vinaigrette
  5. in the last few minutes of cooking, add the chopped garlic to the cauliflower and stir, watching carefully so that the garlic doesn’t burn
  6. when cauliflower is finished, toss it with the arugula and the vinaigrette

I like to serve this will something simple like chicken or salmon or steak.

You could substitute the arugula for cilantro, a cousin to the coriander leaves that they use at Little Tiberias.  I don’t use cilantro because I hate it, which goes to show just how good the version in Israel was!

Read Full Post »

Older Posts »